Gimphoto 24.1 Crack + Download For PC
Gimphoto 24.1 Crack + Download For PC
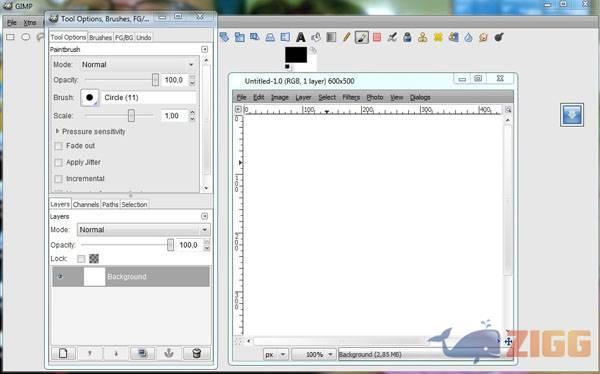
Gimphoto Crack For Windows is a GIMP modification with a new menu, additional plugins and resources to bring the best GIMP experience to Photoshop users. Gimphoto new menu is changed menu structure to more closely resembled of Photoshop menu, but still maintain GIMP menu naming convention. Gimphoto comes with many useful plugins such as: CMYK Separation, Save for Web, Batch Process and Layer Style. Give it a try and see what it is capable of! . License: Gimphoto Modifications and extras are free for personal and commercial use Download Source Code: Download Source Code A: Google Web Designer This is a fairly easy to use online web designer for creating a web site based on a predetermined theme. Google Web Designer. Cisco Simplifies Trademarks Compliance Cisco has been working with the US Trademark Office (USPTO) on new trademark policy. The changes are aimed at promoting greater ease and compliance with the trademark laws and simplifying the process for all companies. The USPTO will begin accepting applications for marks that have a Class 2 or Class 3 filing mark with the USPTO as of November 8, 2013. For example, a business may register a mark that includes the word “Cisco,” and the word “Cisco” is not on the list of excluded words, such as trademarks with the following words: AEDEN* AEDGE* AEON* AERIS* ADAGE* ACHIEVE* ACHIEVER* AIM* AIRMATE* ALGOL* ALICE* ALLEY* ALMA* ALTOS* ALTOCULAR* ALUMINUM* AMBULANCE* AMELIA* AMENITIES* AMERS* AMERYST* AMICA* AMERICAN* AMERICA* AMERICANIZED* AMERICANO* AMERICANA* AMERICANS* AMERICA’S* AMERICA’S* AMERICAN* AMERICA’S* AMERICA’
Gimphoto 24.1 Product Key
This plugin will allow you to quickly convert a selected or entire layers of an image into CMYK by opening your selected layer in Photoshop CS5 or higher. The Color Management is a powerful tool that will allow you to easily convert an image into a new ColorSpace and also a new Output Profile. • Input: Image layer (or all selected layers) • Output: CMYK image layer • Options: • Color Space: RGB, CMYK • Output Profile: RGB, CMYK • Create New Document • Full Screen Mode • Thumbnail Preview: • Window: Full Screen • Auto Refresh: false • Keywords: Gimphoto, color conversion • Author: [email protected] • Version: 1.0 • License: GNU General Public License 972550f159
Gimphoto 24.1 Crack +
Keymap: Caps Lock as Escape Print Screen Insert Key Page Up Page Down Home End Shift + Alt + Del Select Key Backspace Delete Key 0 to 9 - + = {} [ ] ( ) There are so many choices to make! Installing on a USB Flash Drive And creating the bootable USB Next step is to make a bootable USB flash drive. In this post, I will guide you to do that. If you don't have any, I suggest you get one. Making a bootable USB flash drive will help you install the theme on your computer. There are many ways to create a bootable USB flash drive for your computer. Here are the simplest ways that you can do that easily. You can go to the manufacturers website. Many of them provide And you can go to any of the various forums and ask them for help. They are always willing to help you. There are many websites that offer free tools to make bootable USB flash drives. Here is a free tool that I recommend you use. It's a simple to use tool that requires you to only drag and drop the files. It gives you a simple interface and you can also set the file location you want to use as the source of your theme. Here is the link to the tool. Note: Some websites you can access the tool by entering a And you can change the source location as required. Again, it is so simple and easy to use. Next thing is to go to the USB Flash Drive manufacturer's website. And create your bootable flash drive. A good step to do before the installation is to back up your data. In case something goes wrong. Note: The tool will also save the files. Here are some of the main features of the tool: Select Format: You can select the size of the flash drive and you can also set the filesize. All the files will be saved in one folder on the drive. Do not select the USB flash drive (USB) or CD/DVD (CD) Save Path: You can choose where you want the files to be saved. From the tool, it will download the files. You need to enter the folder of the USB flash drive on your computer. You need to click the Start button and wait for the files to be downloaded
What's New in the?
Import or create a drawing and see the results interactively. Use a new 3D view that shows you the drawing from any angle, including at different zoom levels. (video: 1:31 min.) Define any drawing element by type, color, or characteristic. See how you can quickly apply thousands of elements of any shape, size, and color to a drawing. You can apply all your existing shapes to a new drawing, or easily create brand-new shapes from scratch. (video: 1:46 min.) Extend your modeling experience by extending drawing elements by shape, size, and color. (video: 1:33 min.) Save a model element’s shape and size for a repeating feature. New tool bars for text and numeric formatting, and a new tool for rotating text in any direction. (video: 1:31 min.) Relieve the frustration of “stubbing out” a freehand sketch by easily and accurately completing it in the drawing. (video: 1:22 min.) See each block’s properties, including its dimensions, location, and color. (video: 1:36 min.) Use the new ribbon and toolbars to customize and control your work flow. (video: 1:29 min.) Automatic Feature Matching: Make changes to a drawing as you work. (video: 1:41 min.) Match the shape of any 3D model to the shape of any feature in a drawing, no matter where the feature is located. (video: 1:34 min.) Geometric Patterns and 3D Modeling: Place objects in the correct location and angle in your model. (video: 1:25 min.) Easily construct any complex geometric pattern, such as a honeycomb structure, without any manual design or placement. (video: 1:21 min.) Navigation and Viewing: Zoom in to every part of the drawing, even in detailed areas and beyond. (video: 1:18 min.) Surface navigation allows you to easily pan, zoom, and rotate your view in any direction. (video: 1:13 min.) Scale or rotate any drawing element in 3D space. (video: 1:32 min.) New command-line options and views for more convenient navigation. (video: 1:
System Requirements:
NVIDIA’s Founder’s Edition (FE) graphics card is required to play. A supported NVIDIA FE graphics card is necessary to play. Minimum specifications: For minimum system specifications, check out the System Requirements page. Supported NVIDIA FE graphics cards: Founder’s Edition (FE) is NVIDIA’s minimum requirement for graphics cards. In order to play, a supported NVIDIA FE graphics card is required. Dedicated graphics cards: For the full experience, you need a dedicated NVIDIA GeForce GTX 10-
